Introduction:
The results of sanding and polishing hardwood floor procedures may have far-reaching consequences on the surfaces they touch. Sanding and polishing are often employed in refinishing, refurbishing, and restoring procedures due to their ability to breathe new life into weathered surfaces. This video will teach you all you need to know to get results on par with those produced by a trained expert.
Basic Sanding Techniques
Sanding, which uses abrasives to smooth out a material’s uneven or rough surface, is one of the most basic finishing procedures. Sandpaper, a flexible instrument available in grades from coarse to fine, is often used for the aforementioned objective. Sanding, on the other hand, is more than just a preparatory step before polishing.
Surface Preparation:
It is crucial to properly prepare the surface in issue before beginning the sanding procedure. Get rid of any debris, dust, or previous coatings by wiping the area down first. To clean wood, dampen a soft cloth or brush in a mild cleaner and use it to wipe down the surface. You may need to clean the metal or plastic using a solvent or cleaner designed for that material.
Look for dents, scratches, or holes on the surface and report them. Wood putty, epoxy filler, or another suitable filler solution may be used to repair the material’s minor flaws. Before proceeding with the sanding process, check to see whether the repaired areas are dry.
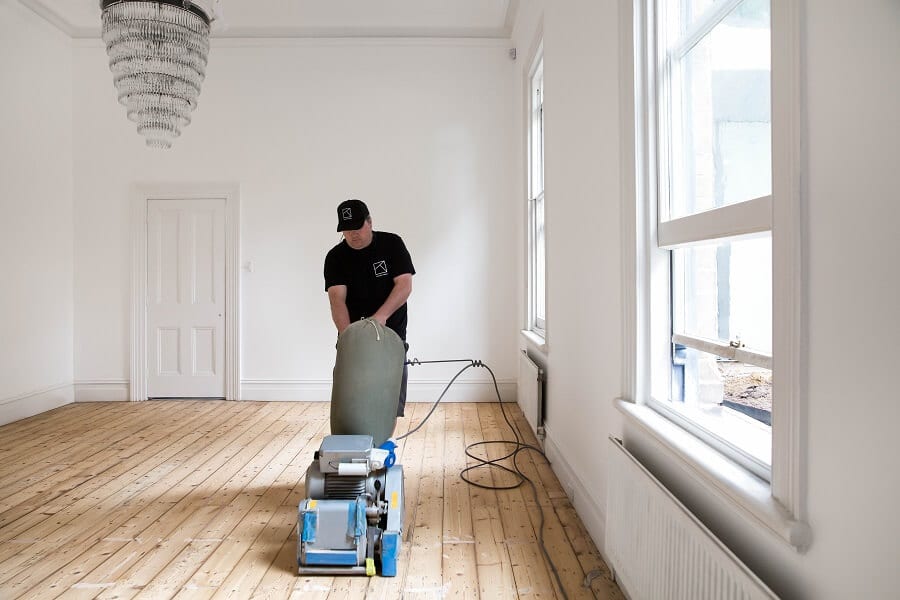
The Sanding Procedure: What Really Happens
Sandpaper with a coarse grit, such 40 or 60, may be used to smooth off any rough spots or outdated finishes. Spread your efforts out uniformly throughout the surface, paying special attention to any particularly difficult-to-reach areas or little details. When sanding, maintain a constant pressure and allow the sandpaper to accomplish the bulk of the job.
Between layers of paint, varnish, or whatever other finish your project calls for, you should sand the surface to remove any imperfections. This process prepares the surface for the succeeding coat, which increases its adherence. The surface should be lightly sanded with fine-grain sandpaper before the second coat is applied.
The next step in achieving a mirror-like polish is to sand it using the finest grit sandpaper you have access to, such as 220. This process eliminates any residual flaws, smoothes out the surface, and gets it ready for polishing. It’s important to sand slowly and evenly so that the surface comes out looking good in the end.
Polishing methods that vary:
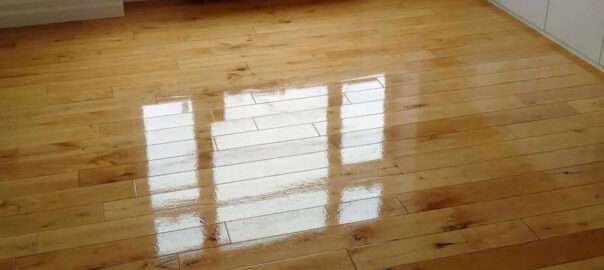
Understanding To get a smooth, glossy, or reflective surface, polishing is required. This aids in removing the small scratches, swirl marks, and imperfections that are left behind by sanding, leaving a smoother, more finished appearance. Sanding produces imperfections like tiny scratches and swirl marks. A polished surface not only looks nicer, but it also protects the underlying material from further damage.
How to Determine Which Polish to Use There is a vast variety of polishes to choose from, and some of them are formulated for use only with certain materials. You should think about how long the polish will last, how easy it is to apply, and the effect you want to achieve before making a final decision. Read the manufacturer’s instructions carefully so that you know how to use the product properly.
Polish should be applied to a clean, soft cloth or applicator pad at first. Use light, circular movements to spread the force you’re providing throughout the surface. Your covering has to reach well up into the corners. Make sure the polish has dried according to the manufacturer’s directions before applying it. The shine may be restored by polishing the surface with a clean, dry cloth in a circular motion once it has dried.
After the Final Buff, Regular Upkeep Is Essential:
Applying a protective finish like wax, varnish, or sealer to the newly altered surface is recommended to preserve its durability for the long term. This helps extend its useful life, prevents further damage, and keeps it looking pristine for longer. Follow the manufacturer’s instructions before applying the sealant.
Following a routine maintenance schedule may help the polished surface last much longer. You shouldn’t use anything abrasive to wipe the surface, since this might harm the finish or make it seem dull. Always keep an eye out for damage or evidence of wear and tear on the surface, and address any issues you find as soon as possible.
Conclusion:
Old furniture, floors, or other materials may be given a second chance at beauty and usefulness with a little sanding and shine. If you follow the steps in this in-depth tutorial, you should be able to restore surfaces with professional-quality results and be delighted with the results. Have fun with the process of adjusting to your new environment, but remember that it’s crucial to be patient and pay close attention to the details.